How to post a blog to your Brand Chiro website!
STEP 1: Login to your website with the information you were provided from our team. Generally this is typing a URL similar to yourwebsite.com/login.
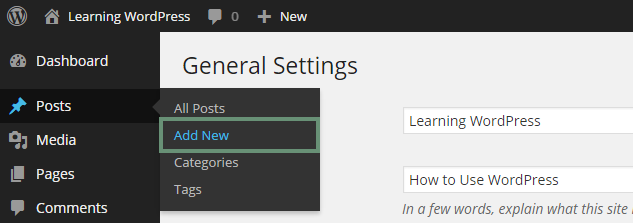
STEP 2: On the left side of your website, you will see a menu. Under the “Posts” section, click “Add New”
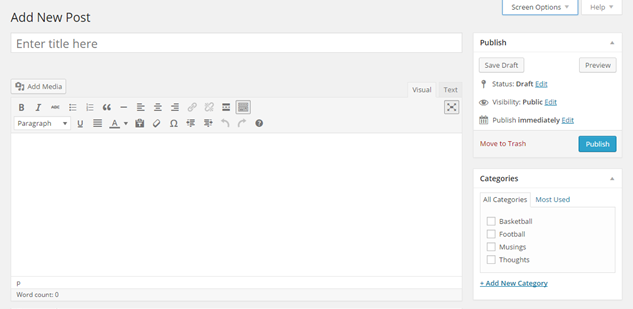
STEP 3: On the next page, type a “Title” that describes your post in the best way, using useful keywords like “Chiropractic” or “health”.
STEP 4: Type your blog in the larger area below the title. Please ensure that all content is written by you or your staff. Do NOT re-post content you found online. You can also use the “Add Media” to insert photos throughout your text. Please ensure that any photos your post are no larger than 600 x 600 px.
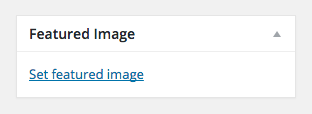
STEP 5: You can add a “Featured Image” to your post. This is important because it’s likely that your blog is set up to show a photo in the main Blog page, and when viewing the actual blog posts. Find an image online or take one of your own, and insert it with the “Featured Image” section on the right side of the blog post editor. Please ensure that you have the proper rights to use the photo. We do not want to use copyright material.
STEP 6: Preview Your work using the “Preview” button to the left side of the screen. This should open the post in a new browser window. If you like your post, then you can select “Publish” and it will post it to your blog page.
You can use the “Publish immediately” section, and set a date to automatically publish this page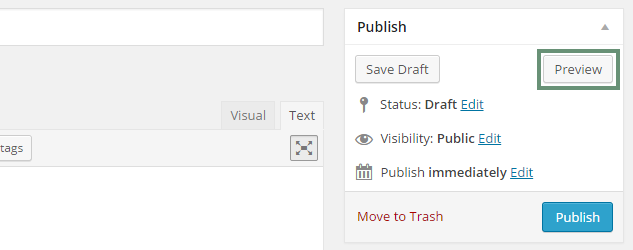 .
.